IoT
Long-term experience
Prologue
Today, everyone is crying out for long-term studies, which is more of a challenge in these short-lived times. In the age of agile development of many products, no one really knows how what we buy today can be used in the mid-term future.
In this somewhat different article on my blog, I am now trying to write a “rudimentary long-term” report. This blog post is not about virtualized applications, Smart-Home, or virtual reality. No, in this blog post I will dedicate myself to another topic that I have been dealing with for a little more than 6 years. It’s about the topic of electric mobility. More precisely, my personal experiences after 5,5 years and 150’000 kilometers (93750 miles) with a pure electric car. I think this is my first post that addresses a somewhat broader audience than my previous articles, which were more interesting for IT experts, “nerds” and smart home hobbyists.
Currently, this topic seems to be very well received and the media is full of lurid headlines about Tesla and other battery electric vehicles. There are already many “EV sympathizers” and just as many electric car haters. There are a lot of false statements circulating and a lot of people parroting.
In this article, I will not cover all these so lurid topics. I will not write about topics like ecology or sustainability of electric cars. I do have an opinion, but I could only cite countless existing studies which are credible to me. Furthermore, I have not done any practical research in this area myself. I’ve wasted too much time discussing these issues over the last 6 years, and I’m frankly tired of it. But here I like to refer to the “Mythbuster Elektromobilität” (in German) by Martin Rotta: http://www.mythbuster.ch. If someone wants to discuss these very controversial topics with me, let’s do it face to face and with facts as well as the necessary respect. I will ignore comments under this article on these topics.
How did it come about that I ordered an electric car?
I had the idea in mid-June 2015 that I would like to test drive a Tesla. At that time I had a Škoda Octavia station wagon with which I was quite happy. A car had to be suitable for everyday use and a bit sporty for me. Further, I had the need to be able to drive with the car also into the vacation. Also I had the need for my hobby, the Scuba diving in Swiss lakes, to transport 2-3 scuba gear. On June 30th I made my first test drive with a Tesla Model S P85. This experience was quite impactful, it was an iPad on wheels with incredible driving fun. An electric car converts the instructions with the pedal without any delay. Since my Škoda was dying, I had too many repairs, then I did a second test drive with a Tesla S85D on July 21, and then finally I ordered a Tesla Model S 70D.

There was only the Model S to order from Tesla and the smallest battery with 70 kWh has blown my budget least high. The D stands for Dual, i.e. 4-wheel drive, this was mandatory in my opinion because my commute led over the Frienisberg which was not really cleared in winter from time to time.
As options, I ordered the air suspension and the rear-facing child seats. On P for performance, a larger battery and the premium package with electric tailgate, front fog lights, ambient lighting, etc. I have waived.
Then the time had come, I became a Tesla driver
On December 30, 2015, I was allowed to pick up my Model S in Möhlin. Although the Tesla Service Center in Bern opened in January 2016, I didn’t want to wait any longer.

This is customer service
However, I came into contact with the Tesla service center in Bern in January 2016. The charging port, equivalent to a gas cap on a car with a combustion engine, did not close properly. It gave an error message on the onboard computer, although it was closed. After I asked in the “Tesla Fahrer und Freunde Forum” for a tip to solve this problem (https://tff-forum.de/t/fehlermeldung-chargeport-offen/9268), a friendly lady from Tesla Bern called me. She told me in her role as a service advisor, if I had time to drink a coffee in the lounge, that they would fix the problem within 15 minutes. So it was then also.
Tesla in everyday life
The first few months with my Tesla were rather unspectacular, though I’ve never enjoyed a car so much. I’m really not a car nut, but I was happy about my commute every morning. Vacation trips were a highlight, every charging station I had to photograph and post on social media 🙈 . When I went to Krk, Croatia for vacation in the summer of 2016, I thought I needed to do some planning. Which Supercharger will I use, can I charge in the destination, etc.? During the trip, I realized that I worried too much, with a Tesla it just works thanks to the Supercharger network. Even more so today than 5 years ago. Today I use it for planning long-distance driving (>600Km) https://abetterrouteplanner.com but only because of the trip optimization and not because it would not work otherwise.
Service
I bought a maintenance service subscription for 1850 CHF for the first 4 maintenance service appointments, up to 80,000 km, which I would no longer do today. Every 20,000 km, a regular maintenance Service is not necessary for an electric car and not mandatory for Tesla to maintain the manufacturer’s warranty. Mostly the car was just checked, the batteries in the key fob (CR2032) were changed and the windshield wiper blades were replaced. Currently, Tesla recommends changing the cabin filter every 3 years, checking the brake fluid every 2 years, and replacing it if necessary. Be aware, my information that a service every 20’000 is not necessary is my personal opinion. I recommend that you make up your own mind and include the manufacturer’s recommendation in forming your opinion. Tesla has more information on service at https://www.tesla.com/support/car-maintenance.
In Switzerland, a good and recommendable alternative to the maintenance service at Tesla, especially after the warranty period by Tesla is, in my opinion, Remo Iseli, former working for Tesla, later Reego Basel und now in Seon with Teslabor (https://teslabor.ch). Remo does excellent, customer-oriented work.

Very shortly before the warranty period was over the 12V battery, which supplies the onboard entertainment system and the conventional onboard electronics, has told me with a message on the onboard computer that it no longer wants to work and must be replaced.
I also found out at the 80’000 maintenance service (50’000 miles) that one of the brakes is no longer ok. The brake was “rotten” due to moisture and too little use, so a brake pad had to be replaced. Since then, I always take care to break properly after driving in wet weather and after washing the car, instead of recuperating so that they dry a bit due to the frictional heat. The 12v battery was replaced under warranty. Brake service and replacement of the one brake pad I had to take over 580.- CHF myself.
In December 2018, I rudely “kissed” a curb on a slippery road. Since the Model S is really heavy, and I was driving somewhat briskly and the impact thus occurred at about 35 km/h (22 mph), the extent of the damage was severe. Some parts in the front area had to be replaced. This was extremely annoying since it was already the second comprehensive damage in which I had to participate in a deductible of 1000.-. But the worst thing here was my customer experience. The repair took only 3-4 days, but the wait time for the parts was very long. I was without a car for a total of 9 weeks. Tesla did not inform me about the whole time how to proceed. There was no replacement car.
So if I had to chart my Tesla experience now on Gartner’s hype cycle, here we are now at the bottom here in the Valley of Disappointments.
Warranty extension
With the above-mentioned damages, I also first became aware that Tesla in Switzerland charges an hourly rate of 210.- CHF for work, which is rather high for an auto repair shop. Reego is here with 160.- CHF (as of July 2021) far below.
To cushion further nasty surprises and their financial impact, I have in July 2019 a 2-year warranty extension for 3200.- CHF concluded with Car Garantie via Garage Gubler.
In 2019, I upgraded the car to be compatible with the European standard for fast charging called “CCS”.
Another repair was due in the summer of 2020 because the eMMC chip went bye-bye. A Tesla children’s disease that affects, so to speak, all older cars from Tesla. More information about this here: https://insideevs.com/news/376037/tesla-mcu-emmc-memory-issue/
In 2021, I had still some minor repairs like a problem with the parking brake, the trunk lock, and the driver’s door handle.
Tesla makes minor repairs at one’s home or workplace with Ranger Service.

Furthermore, a major maintenance service at Reego revealed some minor damages, which also was repaired by Reego. There were 2 wishbones and problems with the steering geometry, also a childhood disease of the first 120,000 units of the Tesla Model S.
Battery (TLDR: no fear of degeneration)

To know how healthy the battery of my Model S is, Remo from reego Service read out the battery for me.
I now know that I still have a nominal capacity of 63.8 kWh.
Important! The battery of electric cars does not degrade linearly, most battery degeneration occurs in the first months of operation.

Quelle: TeslaFi
I can live with that just fine. I try to keep my Tesla always in the range between 20% and 80% when it is standing, which is supposed to be best for the lithium-ion cells according to different studies. If you don’t stick to this and often charge above 100% or drop deep below 15%, Tesla’s onboard computer will tell you to change your charging behavior.
The battery in my Tesla has an 8-year warranty with no mileage limit, and the same goes for the powertrain, i.e. the engine and transmission.
Software
For me, there are 2 reasons that still speak for Tesla being ahead. One is the charging network with the Supercharger for long distances, which I will discuss later. The other is the software. Similar to a smartphone, the software of a Tesla gets better and better after delivery. The updates of the onboard computer come over-the-air via Wifi or rarely over the mobile network on the car. Although my “old-timer hardware” no longer gets all the new features, improvements are constantly coming free of charge.
You can see the latest improvements and history through 2019 here:
https://www.notateslaapp.com/software-updates/history/
Charging network (TLDR: Range anxiety is a foreign word for Tesla drivers).
Tesla has faced the chicken-and-egg problem in electric mobility from the very beginning, dedicated itself to building a fast-charging network in addition to building its cars. This is known as the Supercharger network. This fast charger network is intended for long-distance travel and, as of today, charges at up to 250 KW are possible as long the car can take this power amount. The network of fast-charging stations, which are directly visible in the Tesla navigation system and are automatically integrated into the route planning, is growing exponentially. This is clearly visible at https://supercharge.info/charts.
So far, I have charged at almost 40 different Superchargers throughout Europe. In 5.5 years, I have never experienced a Supercharger being out of operation for technical reasons. So far, I have had to wait 2x because all the slots were occupied for about 500 charging processes.

Tesla’s “normal speed” charging stations, which can be found at hotels, amusement parks, campgrounds, restaurants, etc., and which Tesla calls “Destination Charger”, have been open to all car brands since the beginning. Here Tesla kept to the standard from the beginning. Every Tesla in Europe can also be charged at a normal Type2 charger.
The announcement by Elon Musk, the Tesla CEO, that other cars will soon be able to charge at the Tesla Supercharger is completely new. Since the launch of the Model 3 in Europe, the Superchargers have also been equipped with the CCS plug.
Cost overview (TLDR: tires are the most expensive)
I have written down all the costs I had to spend for maintenance, repairs, consumables like tires and accessories in a spreadsheet. All figures are in Swiss francs (CHF).

Here are a few important additions:
- As a “Tesla Early Adopter” I received Lifetime Free Supercharging from Tesla, further you can still charge many places for free. Therefore, the figure for electricity purchase is very low at 1658.- CHF. The Tesla S 70D consumes about 20 kWh per 100 km and 1 kWh costs about 0.23 swiss francs here. So if I had paid each kWh itself, we would talk about electricity costs over 150,000 Km of 6,900 CHF.
Fun fact: If you have a look at battery report above, you can see that I charged 20’578 kWh DC and 14’591 AC. No, I’m not nicely calculating this numbers, but every time you drive down a hill the car regenerate energy which goes into the DC charging counts.
- Cost savings on road taxes I have not included, these are different from canton to canton. In Bern, I had the first 2 years 50% discount.
- As unforeseen are the 2x deductible of the hull damage listed. These would not be mandatory 🙂
- The warranty extension was not worth it, too little was broken on the car during the warranty time. Nevertheless, it let me sleep more peacefully.
- The maintenance service subscription over 1850.- I would not buy today, but pay for the maintenance services themselves as needed.
- With the tires, I could make 2x a bargain and buy almost new 19″ summer tires from someone.
What next?
Now it was announced that from September the Model Y (Made in China) can be delivered to Switzerland. This is actually the car I would like to have as the successor to my Model S. However, from an economic point of view, it makes more sense to drive my Model S for a while longer, which is what I have in mind now. With the old nose cone (pre-facelift) I almost feel like a Tesla veteran 🙂 I may upgrade the onboard computer to also enjoy some of the new features that are delivered via software updates. At the moment I have a real range of 342 km in summer, which is enough for 95% of my trips. In addition, I have with this car lifelong free fast charging at the Supercharger. Back to the Gartner Hype Cycle, I see myself now on the plateau of productivity.
Would I buy a Tesla again and why?
In my eyes, Tesla is still a nose ahead, although I also quite like vehicles like the Škoda Eniaq, the VW ID4, or the Mustang Mach-E and would possibly risk a test drive. In terms of software updates, however, I still see Tesla way ahead. Also, the Tesla Supercharger charging network speaks for Tesla, here is exciting what happens now when Tesla opens the Supercharger network for all-electric cars. Above all, I’m wondering about the pricing policy here. Some fast-charging networks charge exorbitant prices for charging.
I hope you enjoyed my article about electric cars and Tesla. If you have a specific question, do not be hesitated to write me a comment below. Take care, a test drive of an electric car could be dangerous because you might want to change your car afterward. But if you really want to know if an electric car is something for you, I recommend not only a normal test drive, I recommend renting an electric car for a few days. If you live in Switzerland, I can recommend the company Tesla4All or EV4All.
Referral Links
Of course, I have various referral links where you can benefit when you buy a Tesla or Online services for any EV:
Use my referral link to buy a Tesla product and get discounts and other exclusive benefits: https://www.tesla.com/referral/sacha3162
For the logging service TeslaFi: You can test TeslaFi 1 month for free with this link:https://www.teslafi.com/signup.php?referred=1monthfreefromsacha
If you want to test AbetterRoutePlanner, it’s free, if you want to use Premium, this link will give you 30 days for free: https://abetterrouteplanner.com/premium/?referral=OHZNSWLI
I have not received any incentive benefits or monetary compensation from Tesla, Reego Services, or Tesla4All / EV4All for my text. My recommendations are based on my honest and my own experiences.
Underwater
I really like summer and as a scuba diver I like a lot thins what are under water.

But last week after a summer storm there was to much under water … our basement was flooded 🙁
I’m not routinely in the basement, just when I need to take up a bottle of wine or something out of the freezer.
Until last week our basement was poorly equipped by IoT, the only one what I do is that I measure the power consumption of the freezer. But that exactly saved me from more damage, I was alerted because the freezer started to consume 100 watt instead of the usual 45 watt. So I decided to sight what is wrong. The basement was already flooded with 40cm of water.
Now I’m prepared for the future, I have installed now a Fibaro Flood Sensor and integrated to my Smartacus Smart Home System . Now I can see earlier when water comes into the basement and I have the chance to power off the freezer and to alert somebody to exhaust the water. The installation of the leak sensor with smartacus is pretty easy.

I learned, when a Smart Home System is present – it definitely makes sense to have sensors for all possible issues.
My Smart Home – Chapter 3-1: Smartacus – non tinker solution? Unboxing and putting into operation
Beside of Citrix and virtualization topics I had already Smart Home and IoT topics in the past here on this blog. You can find posts about smart switches and bulbs or about a smart switch combined with the LaMetric smart watch.
Recent weeks I wrote about my smart mirror and about Home Assistant, both are projects which require advanced IT knowledge and are only interesting for people with according skills and time for a DYO project. REST and Python should not be unknown words … Often I was asked “Sacha can you please also build this for me?” I have a full-time job, I have a family, I’m active for the Citrix community and sometimes I work in my free time as a Scuba Diving Instructor. So, I’m pretty engaged and I cannot spend time to do this for others. But in my opinion, everyone should have the possibility make his home smart.
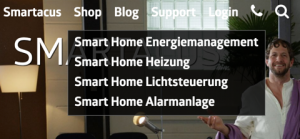
Some weeks ago, Smartacus has come to my attention. This complete solution is pretty similar like the Home Assistant which I blogged about last week, it combines different components to one place. Smartacus is a product by Energie 360° and is developed for the market in Switzerland.
Compared with Home Assistant is Smartacus a commercial product for End-users, which don’t have the time or skills for a DYI project.
In December, I received my Smartacus Start package, in this post I write about the chosen components, the Unboxing and putting into operation.
Packages – the components
It’s possible to choose predefined packaged from Smartacus or to build an own individual set. Basically a Smartacus-setup consists a central unit and one or more sensors and “actors”.
The central unit has connections to the local components and is connected to the “Smartacus-Cloud” in the Internet. But now I’m already way to technical, Smartacus is for End-users which won’t know too much about the tech.
 If somebody don’t know what he need, it’s possible to talk with the Chatbot on the Smartacus web site. The Chatbot will help to choose what you need and fill up the shopping basket. A nice example how a Chatbot can help.
In reason, I don’t have a photovoltaic system and I’m living in a rented apartment I decided to start only with the radiator thermostat system and some added components.
This System would be definitely thrilling in an owned house with a photovoltaic installation.
Unboxing
I opened the package and immediately I remarked that Energie 360° and Smartacus are not boring people. Even I didn’t ordered the energy package, I received some personal energy for the time on which I install my Smartacus System. Some food and an energy drink …
I ordered the following components : 
- Central Unit
- 3x Radiator thermostat
- 2x Door- / Window Sensor
- 1x Smoke detector
- 1 Multi Sensor
- 1x flush-mounted switch relay
- 1x Switch und measure plug
Putting in operation
Central unit
To put the central unit in operation is an easy thing, just plug in the Ethernet cable to the switch or router, plug in the power cable in – and the physical installation is done.
After the Smartacus central unit is online you can login to the portal and configure your setup, the system will guide you through all steps.
I was in doubt to have another central unit in my network, I have already one for my Philips Hue and one for my WirelessTags. I thought another new device which needs power… but this time I was positively surprised, it consumes 7 Watt on start-up and 4 Watt in normal operation.
Integration of Smart Devices
 The integration of new devices is simple, on the portal the binding of a new device is handled in three steps. The action which has to be done on the device is explained on the portal.
Formerly I had already radiator thermostats from another manufacturer, but those I removed after I found out that already a slightly touch demolish the installation.
This new radiator thermostats supplied by Smartacus are manufactured by Danfoss and are from the quality perspective much better and stable. The installation can be done in a few minutes:
My interim conclusion at this point:
+ very easy installation
+ high quality components
– Limited number of components by Smartacus
My Smart Home – Chapter 2: Home Assistant
After my smart mirror project which was exciting, I can still only see the values of the integrated sensors on the mirror. The problem that I can’t control my smart devices from one place still exists.
The conglomeration of smart devices in my home is very various, I need to work with something which is open for almost everything imaginable.
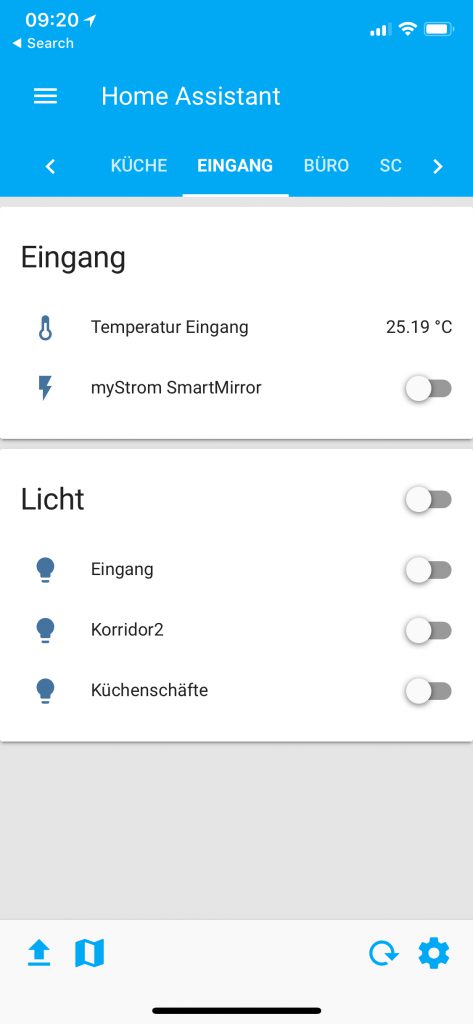
On Facebook, I saw a post of an acquaintance who adverted for Home Assistant (home-assistant.io). Home Assistant is an open-source home automation platform running on Python 3. Track and control all devices at home and automate control. Perfect to run on a Raspberry Pi.
Hass.io (Home Assistant) is still in development but works already good. I’ve started with version 0.48 or so and now in December 2017 we are on 0.60.
First I started with Hass.io on a Raspberry Pi 3, but then I’ve upgraded my Synology NAS and the new one is able to run Docker, so I moved my Home Assistant to a Container on my NAS.
I don’t write here now a post how to install and run Home Assistant, that you can find in Getting started on hass.io, the intention of this post is a short Intro for Home Assistant with some hints for the practice.
For Hass.io there is also a mobile app, you can use the App if you are in the same network as your Home Assistant server or you have a VPN connection in this network. It’s also possible to expose the server to the internet, it contains all you need for that like duck dns and Let’s Encrypt. But I won’t do that for security consideration.
Devices and Components
Home Assistant has a very broad range of supported smart devices, I added the following devices to my system:
- Philips Hue
- MyStrom (Bulb, Wifi Switch & Button.)
- Different Sensors from WirelessTag
- Tesla Model S (want buy one?, use my referral code)
- Netatmo Weather Station (Amazon Link)
- UniFi Controller
- Arlo Webcam (Amazon Link)
- Philips Webcam
- Apple TV
- Sonos One (Amazon Link)
- Logitech Harmony Hub (Amazon Link)
- Some Devices in my Network can be started with Wake on Lan.
A short demo of how that looks on my environment:
Automation
Before I used Home Assistant I automated some of my smart devices with IFTTT, with hass.io I can now do that “On Premises”.
I created the following “recipes” for my home automation:
- If the IKEA lamp in my living room turns on, also turn on the lights in my vitrine (LED plugged in a MyStrom Smart Plug):

- If my UniFi controller doesn’t see any Wifi Mac address of the mobile phones of my family members, the automation “Away-Mode” turns on. This procedure powers off some Smart Plugs, bring my Sonos Player to pause, and all Hue lights will be turned off.
In contrast to IFTTT it’s possible with hass.io to combine things almost indefinitely. It’s possible to define so-called Conditions.
Helpful Hints
If you try Home Assistant and you start to create and modify your *.yaml files, really use a text editor which shows you invisible characters! Python is very fussy for syntax errors even when only an invisible character.
Make backup from your files before you modify it, this can help to avoid some frustration.
If you intend to add a MyStrom Smart Button, I found out that this doesn’t work currently if your Home Assistant Web GUI is protected with a password.
Conclusion
A big benefit of Home Assistant is that it’s an open system with a large developer community, there are many components integrated and it’s possible to integrate by your own.
The downside of Home Assistant is that’s currently not yet a solution for an Enduser without any IT skills. More and more it’s now configurable via Web GUI but without any IT knowledge, it’s impossible to manage it.
+ Command center for your Smart Home
+ Cheap
+ Interaction with your smart components is possible
+ many Components integrated
+ App for your mobile phone or tablet computer
+ – Open Source (Open to integrate other things, improve code vs Security)
– Not an End-user product
– Needs Maintenance
A short preview for my third Smart Home article, I will show you something which is also usable for End-Users without IT Knowledge. I know the readers of my blog are mostly IT Pro’s but I’m sure you have also friends who want to play the Smart Home game and have no clue how to start.
My Smart Home – Chapter 1: The Mirror
A colleague complained that he has a 22-inch screen which he doesn’t use anymore but he can’t sell it for a valuable price. So I said he can give me the screen for free and I would convert it to something cool, I had already an idea what I want to do with it …
My intention was to display some measurement data of my home which I collect with Netatmo or WirelessTag . Furthermore, I had the idea to supersede the paper wall calendar with a digital calendar. We use already Google calendar but my wife has the opinion that she needs a calendar not only accessible with a computer or a mobile phone, there must be also something on the wall to get faster an overview about the upcoming events.
Mirror, Mirror, on the Wall …
So I told my wife that I plan to install a monitor screen in our entrance area, honestly, the enthusiasm was very limited. I found out that the WAF – the wife acceptance factor for a monitor screen in the apartment is pretty low. So I needed another idea, accidentally I saw the MagicMirror² Project which is the solution for my Software Plattform and also the word “Mirror” solves the WAF-Problem.

So there is now no more a monitor screen, instead, my project is a Mirror, a Smart Mirror to be precise. Behind the Mirror is a Raspberry Pi 2 located which is powered on 24/7, rather the power of the screen itself is controlled by a MyStrom Wifi Switch in the early morning a motion detector turn the mirror on, at other hours in the day the screen can be activated with a push on a MyStrom Wifi Button. If the Mirror is powerless it looks like an ordinary mirror.

At the end this was how my prototype looks like:

It was a long journey and I invested a lot of hours until I was happy with the result of my project.
First I started to cover the screen with an acrylic glass laminated with a mirror foil. I was not satisfied with the result, I had inclusions of dust and air under the foil. Only the more expensive but high-grade real Spy-Glass from myspiegel.de made me happy.
It was also difficult to decide which content should appear on the display.
Content
Currently, my configuration shows this content:
Top left
– Date and Time
– Google calendar from my wife
Top right
– Weather forecast
– Hue Status
– Recent Calls (Fritzbox)
Bottom left
– Trello Task of our family
Bottom right
– Power meter of different Powerplugs (REST via MyStrom)
– battery state of charge of my EV

Bottom center
– Headlines of “Berner Zeitung” the local Newspaper (RSS)
Component List
- 22″ Screen who has a Digital Input – Raspberry has only HDMI (I took an old one and removed the Case – on your own risk!)
- Raspberry Pi & Power Supply
- Spy Glass – I ordered on myspiegel.de
- Smart Plug (optional)- e.g. I have this one MyStrom Wifi Switch
- Smart (IoT) Button (optional) – e.g. I have this one MyStrom Wifi Button.
- Motion Sensor – e.g I have one from WirelessTag (optional)
- Some pieces of wood from your local DYO Store
(As Tools I used a hot glue gun, a saw, and some screwdriver )
Conclusion
The mirror definitely gives an added value, but it’s really only for DYO’er or Nerds … No Enduser-Friendly product. It also needs maintenance.
This is a device for consuming information but you cannot interact with your devices. Maybe in Some years possible with a “Touchscreen-Mirror”.
+ Added value in a Smart Home
+ Cheap
+ – Open Source (Open to integrate other things, improve code vs Security)
– Not an End-user product
– Needs Maintenance
– Only show information, no interaction with devices
IoT – ideology of technology | new MyStrom Smart Devices
 Those who know me in person are aware that my life is not only controlled by Citrix technology, I’m also fascinated by Smart Home stuff and Internet of Things, IoT. Since years I use Philips Hue, Netatmo and other gadgets to make my life easier – or to solve problems which I won’t have without this Smart Home devices… Some of my neighbours believe that I have a girlfriend called “Alexa” and I’m very rude to her.
Anyway, I already wrote about the MyStrom Smart plugs in the article Control MyStrom smart plug by a trigger or Another LaMetric IoT script – power control .
The special thing about the MyStrom WiFi Switch is that they are only for Switzerland, we have here not the same wall sockets like they are common in Europe. For this reason in my point of view MyStrom is a niche product, even when it’s a very very good product.
Today I received a package from MyStrom with two very cool new products inside, the MyStrom Bulb and the MyStrom WiFi button. I have already similar products, for the Smart Bulb from Philips Hue and SengLed Boost. For the button I have currently an Amazon IoT button, which I have connected to IFTTT that I can trigger some things.
In this post I want to compare this new MyStrom devices to other existing devices on the market.
Comparison Smart Bulb:
myStrom WiFi Bulb
- 39.- CHF (Color)
- Color
- E27
+ Has a HTTP Rest API
+ Show power consumption
+ great colors!
– only 600 lm
– Bulb becomes pretty hot, 52,9°C after 30min test.
Philips Hue
- 69.- CHF (Color)
- 20.- CHF (White)
- E27 and GU10 available (Update: Now also E14)
+ Use the ZigBee protocol
+ Up to 806 lm
– An additional device, called “Bridge” is required
– Colors not so saturated
– Range is limited, I was not able to have a Hue Bulb in my garage, why I added a SengLed Boost.
– Bulb becomes pretty hot, 62,5°C after 30min test.
SengLed Boost
- 59.- CHF
- E27
+ Works as an Wireless Wifi Repeater
– only 470 lm
IKEA TRÅDFRI
LED-Bulb E27 1000 lm White
- 14.95 CHF (White)
- Color also available but not with 1000lm
- Uses 12,4 Watt
- Is compatible with Hue-Bridge after latest firmware and perhaps 3rd party Software
+ brightest and cheapest Bulb
– Bulb becomes pretty hot, on some parts 84,9°C after 30min test!
Conclusion: It really depends on your needs which Smart Bulb is the best for you, if you have already a Philips Hue ecosystems it makes no sense to Switch to MyStrom. But if you start on green field, you really have to consider to go for MyStrom. With MyStrom you have Bulbs, Plugs and Buttons from one brand. The MyStrom Bulbs are cheaper than Hue and for me very important every MyStrom device has his Webserver which allows you to toggle the power state. If you want o extend you Wifi Range, have a look to SengLED Boost Bulb, but wit this it’s not easy to toggle the light with something other than the existing app.

Comparison Smart Button:
MyStorm WiFi Button
- 25.- CHF
+ Availible in Switzerland – for everyone (soon …)
+ Battery rechargeable
+ Native IFTTT compatible
+ 3 Push Patterns
+ Fast reaction time (< 2sec to toggle a Switch)
Amazon IoT Button
- 19.90$
– Only for Amazon Prime customers
– Battery not replaceable
– Reaction time pretty long
+ IFTTT with an “special setup” possible
+ 3 Push patterns
Hue Tap
- 69.-
NOT TESTET!
– need the Brigde
+ No need for battery
+ 3 buttons
Hue Dimmer Switch
- 29.-
NOT TESTET!
– need the Brigde (?)
Conclusion: For most “Home-automater” the MyStrom Wifi button will be the best choice, the way to configure an AWS IoT button is an “advanced expierience”. I don’t like that the Amazon IoT Button has a non replaceable/rechargeable battery inside. If you have already a large huge Philips Hue ecosystem maybe the Hue Tap / Dimmer Switch is the best for you.
Use Octoblu with Amazon Echo as trigger to start A/C on Tesla Model S
It need’s a bit courage as a non native english speaker and with my hard swiss accent it’s maybe awkward … but I’ve done it … my first webcast … you cannot win without a risk 🙂
Goal: Use Amazon echo to start the Air Condition of the Tesla Model S.
21.6.2016, Update to this post:
It’s not so difficult to use Alexa without IFTTT in Octoblu, I just created a flow to ask Alexa what’s the battery level and she tell me the remaining battery in percent:
Details about how to integrate Alexa in octoblu look at this: Use Alexa to kick off automations with Octoblu
By the way: If you don’t have a Tesla but you like to buy one,use my referral Link http://ts.la/sacha3162 and safe 1000.- !
Control MyStrom smart plug by a trigger (ifttt or octoblu)
 Some weeks ago I bought my first smart plug from MyStrom. If you are living in Switzerland you have only a limited choice of smart plugs because of the non EU standard plug (T13).
MyStrom is pretty cool because it mets almost all my requirement, there is a possibility to measure to power consumption within two rates (day and night), it’s controllable with the mobile phone app and there is a nice web interface.
But one thing I miss, I cannot react to triggers and power of the smart plug on a defined event. Like already in an earlier post mentioned there is a REST API which allows to control the plug from the internal network. (See Another LaMetric IoT script – power control)
Last day’s I just found the API documentation which allows to control the MyStrom out of the cloud:
https://mystrom.ch/mobile/
So I have now all to connect this Thing to the Internet and react on a trigger.
Possibility 1: The everything imaginable way,
MyStrom and Octoblu
 +
+ 
If you are using Octoblu beta, which is currently available for everyone for free you can create very intelligent workflows to control your smart plug. You can react to twitter and power of or on depending what is twittered, you can power off your heater as soon a temperature is reached, you can stop charge as soon your device have a defined state of charge.
The Things you connect use with Octoblu are nearly infinite.

Octoblu is for advanced use, and to be honest I’m also on the learning phase! I do not describe here more details for this case. There are a lot of sample blueprints on https://www.octoblu.com . Octoblu was acquired by Citrix in 2015.
Possibility 2: The easy way,
MyStrom and IFTTT
+ 
This way is suitable for “Home use” and for people who only want to create a simple workflow where a trigger initiate for example a Power On or Power Of of the smart plug.
All what you need is a Control-Script on a Webserver with PHP on the Internet, and a IFTTT account.
How it works: The script is very simple, it just handle the authentication process on the API, read the AuthToken out of the JSON answer and Push out the payload with the AuthToken. IFTTT just take the trigger and call the script with the username, passwort and the payload which you can build from the API
Example: I want to control my smart plug by twitter, if I twitter #lightsoff
Step 1:
Take this script and put it on your webserver:
<!--?php


/*
V0.1 by Sacha Thomet, www.appcloud.ch, 12-2015


This script can be used to control the MyStrom power outlet with IFTTT.
In IFTTT you need to take the MAKER component to make a web request.


The script must be called with 3 parameters:
- Your MyStrom username (email)
- Your MyStrom password
- the decided payload
 e.g. ../device/switch?on=true%id=64002D012305 to turn on your device with Mac 64002D012305


 Documentation of all API calls: https://mystrom.ch/mobile/
 Attention! You need to replace in your payload all "&" with a "%" !!


 Example:
 myStromAuthenticator.php?email=joe.doe@gmail.com&password=mysecreatword&payload=https://mystrom.ch/mobile/device/switch?on=true%id=64002D012305


*/


//create variables from parameter
$email = ($_GET["email"]);
$password = ($_GET["password"]);
$payload = ($_GET["payload"]);


//myStrom host with the parameters to gather the AuthToken
$host = "https://mystrom.ch/mobile/auth?email=$email&password=$password";
$filestring = file_get_contents($host);


//format the AuthToken that only the token remain from the JSON Answer
$startpos = 0;
while($pos = strpos($filestring, "authToken", $startpos))
{
 $string = substr($filestring, $pos, strpos($filestring, "name", $pos + 1) - $pos);


 //echo $string. " ";
 $newstring = str_replace("authToken","","$string");
 $newstring2 = str_replace('"',"",$newstring);
 $newstring3 = str_replace(":","","$newstring2");
 $authCode = str_replace(",","","$newstring3");


 echo " AuthCode is $authCode
" ;


 $startpos = $pos + 1;
}


// Because & cannot submitted in a $_GET we subsitute it with a %
$correctpayload = str_replace("%","&","$payload");


echo "Full payload is: $correctpayload&authToken=$authCode";


$fullpayload = "$correctpayload&authToken=$authCode";
$payloadString = file_get_contents($fullpayload);


?-->
Step 2:
Create a recipe on IFTTT, use Twitter as Trigger and Maker as Action. In maker you create your request:
[yourwebserver]myStromAuthenticator.php?email=[youraccountemail]&password[yourpassword]&payload=[yourpayload]
e.g. the payload to turn of the device with Mac 64002D012325 is: https://mystrom.ch/mobile/device/switch?on=false%id=64002D012325
The result should be that:

You create 2 of those recipies, one to Power On and one to Power Off
Now you can twitter you defined hashtags to control your smart plug.

